
Like many of us, I am forever on the look out to managing power connections and of late have been moving more towards standardizing on Powerpoles for my (up to) 45A Connections.
Recently, I purchased one of the WARS (Waverly Amateur Radio Society) Powerpole Kits and finally found a bit of time to assemble it. I won’t go into any details on the kit – all the info is available from the WARS site.
The assembly is pretty straight forward, just take your time and follow the instructions and it will all come together.
Have a decent high-power soldering iron available. My 15/40W soldering iron was on the lowest end of what you would want! It took quite a lot to heat up the connections on the + and – rail sides, there is a LOT of copper on the board. I would have liked a 60+ W iron to do this, and will borrow one for the next kit I assemble.
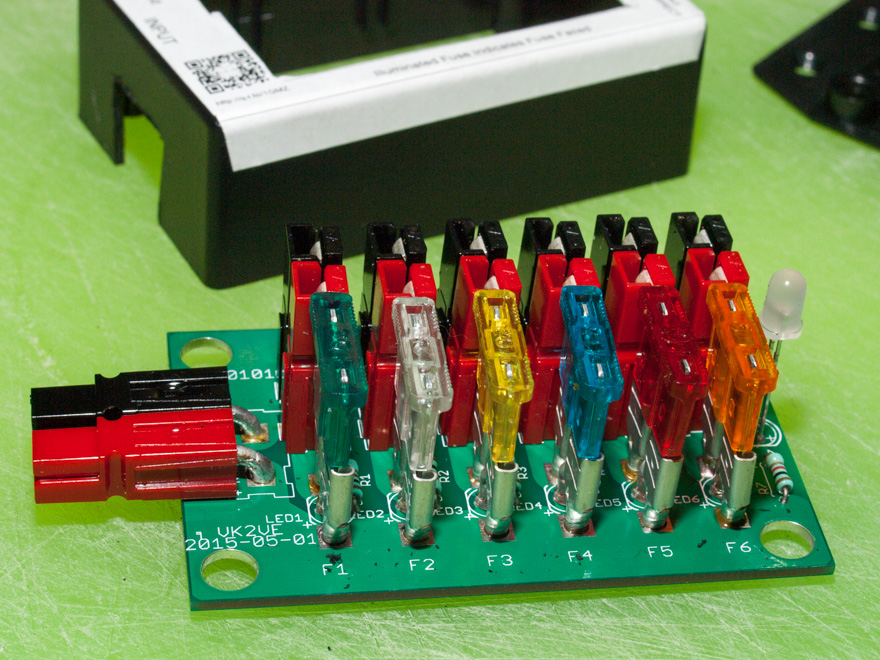
It took me a few hours to assemble it – partially because of the low-powered soldering iron and aside from that, just took my time, careful with the alignment of the power poles and the fuses. What I didn’t do, but should have done is to trim off the leg lengths of the #13 wire on the power poles BEFORE soldering them to the board – it was difficult to trim them off after soldered to the board as you will need a strong pair of snips to trim them.
It all went together just fine and now I have done it, I need to purchase another couple of these :). This was bought for a specific purpose and also to see if it would make a suitable alternative to a commercial one – wins on all counts.
After assembling there is room for a few Improvements:
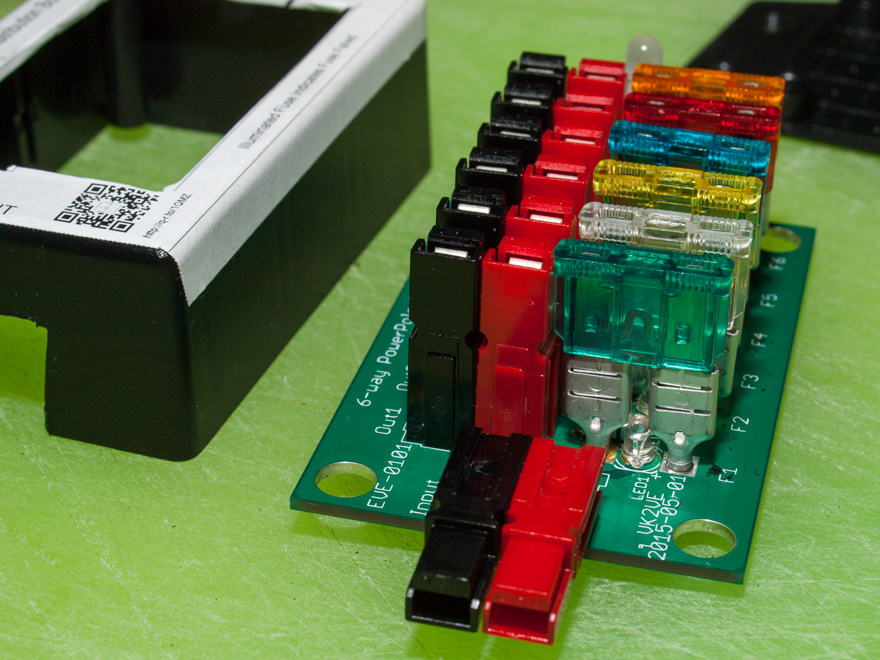
If you install the Input power poles on the board at the 90Deg (like mine) the instructions say to make the cut-out 18mm wide and 15mm deep into the case. the 18mm is a nice neat fit, but the 15mm leave a big gap, I would say that 13mm is more than enough. It is easy to trim a little more out, but much harder to add it back in!
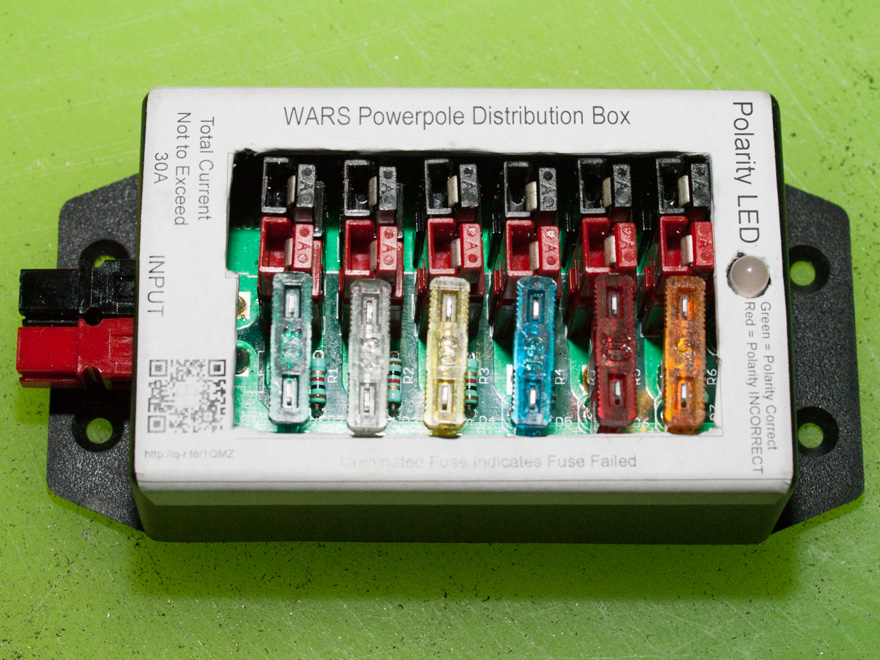
Additionally, the print-out for the cut-out in the top of the box is also wrong! It is way too long – the end closest to the INPUT should be about 3mm less than the template. The end with the LED is correct.
Be careful with the alignment of the template when cutting it out – as mine was about 1mm off to 1 side and I had to ease the opening out a bit wider so it would all go together. You can see that on the side of the power poles that there is an extra gap – as the cut-out was slightly off, and the side near the fuses needed to be eased slightly for everything to fit.
The kit includes insulated spade connectors which are used to hold the fuses. I tried following the instructions supplied, but found it faster and easier to cut away the insulation with a knife.
A nice touch is the blown fuse indicator – where a small red LED will light up when a fuse blows making it obvious of where the problem lies.

You can see the bi-coloured power LED. With the correct polarity, it is green, reversed it is red – you don’t want to see it red, but at this stage, you do want to test it to verify.
At around 1/3 of the cost of an equivalent commercial product, adding a couple of these to your portable and field day kits will not break the bank – and provides an easy, convenient way to fuse protect your equipment, with enough outlets to power almost all of your equipment. For that matter, adding a few to your shack as well is a good option for DC distribution
Those minor issues aside, pretty happy with the end product. All in all, I rate it as 4.5/5.
Thanks for the review, I’ll order one and have a go also.
I wonder if there is a neater way to do the top panel – rather than just cutting out a large section – something that would support the sockets a little . Not sure what but it would make for a slightly better finish. I’ll put this to WARS – otherwise an excellent little project
73
I finally got around to putting mine together, with the upgraded kit, purchased through BMARC some time back.
Nifty little set. I did make some modifications, nothing over the top but I added some safety features that I think were necessary in case little fingers made their way in.
Safety should always be the first priority and there was maybe a little oversight here.
I give it a 4/10 for completeness. The documents included were rough as bags but this online filled the gaps.
Cheers.