Category Archives: Equipment

Repeat Performance

After Yesterday at  Brookfiled CP, I was really keen to get out again and look LP EU on 20M, so I headed up to Mt Gawler – VK5/SE-013 this afternoon.

It was a windy and threatening to rain, but got up there and set up both verticals again pointing at around 120Degrees.

Got on the air just after 05:00UTC and found a clear frequency on 20M and posted a spot on sotawatch.  A couple of VK’s responded and then a few EU stations started coming up.  About 20 minutes into the activation the rain did come in and threaten to make it uncomfortable, but fortunately it only lasted 3 or 4 minutes.

It was fairly steady going and in tough conditions managed to get Ed (DD5LP) in the logs – which he subsequently reported I was the 2nd ever VK sota summit he has managed to complete from his home QTH)  and in Ed’s words,

I'd say that your antenna is an unmitigated success!

I had someone else in EU then start calling CQ over the top of me, but lasted only a minute or 2 – and then the floodgates opened for the next 30 -40 minutes and I suspect it was as a result of Ed posting a spot on the Cluster and  in just over an hour, I had logged 45 contacts on 20M with 36 of them being EU DX!

Again, I need to stress that I am just using the KX3 and only 10W – Yes, QRP power only and not running a big battery and a high-powered station.

A highlight was to get VK4FO in the logs! he said there are only a few of us and when he saw my call on the cluster he just had to give me a shout – Thanks Gordon!

Mt Gawler 20150510


Again, I set up the table between the 2 Verticals.  I was able to use an exiting post to mount 1 of the antennas against and had to drive in a stake to support the 2nd one.  Hopefully, next time I am there, I will be able to pick the same spot to set up.

For the 70 minutes I was on 20M I worked the following prefixes.

VK6, VK3, OK2, S58, G0, DL2, HA8, HA6, VK4, DD5 (Hi Ed), VK7, VK5, ON3, OP7, ON7, DL5, I5, OK7, OE5, IW0, IZ8, DK1, IK6, OE8, IW1, 9A7, IK1, IZ3, HA0, I3, DK4, G1, ON4, HA6, PB2,  F2, RV9, DK2, VK2

As always, I fired up on 40M before leaving and worked another 6 stations to finish this cold activation with 51 contacts logged.

So yeah, this experiment of going back to a basic resonant antenna’s has been a real eye opener for me – as over the years I have used all sort of multi-band verticals and never really had much success with them.

Yes, 2 elements on a summit are really a lot better than a dipole and Now I have to totally re-think my portable antenna’s and probably spend the next several month’s building antenna’s for other bands as well.  I can see the weight going up with carrying  more antenna’s.

EDIT: I have just checked my logs – and this activation was my most successful sota activation of all time – with 51 contacts logged. Additionally, I added 3 new DXCC countries to my tally.

FX-4a Transceiver Review

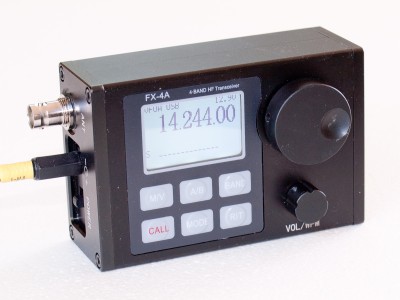
Late last year (2014) the FX-4 got a re-design (update) and has been re-released as the FX-4a. I was able to get one a few days ago (March 2015) and have been putting it thru it’s paces.  For reference, the tested FX-4a in this review has serial number 000047.

FX-4a

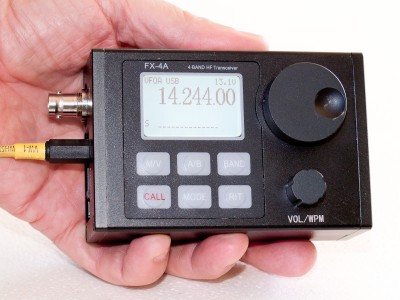
Spec- wise the FX-4a looks to fit into a hole in the market of available QRP portable HF transceivers.


First off, a quick look at the manufacturer’s specifications.

FX-4a Specifications

ItemManufacturer's spec
TX power5W CW and SSB
Weight450g
Input power10-15V
RX current: 250ma
TX current: 1200ma
Coverage
Tx and RX,
40M Band
30M Band
20M Band
17M Band
Tuning Steps10hz, 100hz and 1khz
ModesCW, USB, LSB
VFO2 independent VFO's
RIT+ and - 10khz
Dimensions112 mm L
76 mm W
42mm T
Plus connectors and knobs
Spurious emissions-43db at 5W (Meets FCC guidelines)
RX sensitivity0.3uV
RX Selectivity-3dB/2.6Khz
40dB/4.5Khz
Filtering
SSB and CW
2.6khz
Audio OutputVia Speaker Mic or
1 W into 8 ohm external speaker
CW keyer5-50wpm
Iambic A and B
Memories10 per band
Frequency Stability<5hz after 5 minute warm-up to 30deg
<10hz after 1 minute operating at 40deg.
The Specifications for the FX-4a

CW – an Operators perspective

First off, let’s look at the CW performance from an operating and usability perspective.  Not being a CW operator, I asked Theo VK5MTM to have a bit of a play with the FX-4a and provide feedback on the CW performance from a User’s perspective.

Theo’s normal CW set-up is with his IC-7410 and his Bencher Paddle.

The FX-4a – tuning in CW mode was fine – the Filter is sharp enough to tune a single station. Using an external speaker, there is plenty of volume to comfortably listen. The sidetone tone can be adjusted via the menu, but for the testing was left at the default 800hz

Usage, The built-in keyer is variable from 5-50 wpm and we set the speed up to around 18wpm – which is about Theo’s normal operating speed.  The Menu was configured for his Paddle, and then we tuned around the CW segment on 40m to start with and connected to his normal OCF dipole.

RX sensitivity was pretty good – no trouble using the SDR to “spot” and then tune to any signal that was seen.

With the tuning steps set to 10hz, tuning was crisp and precise, with the 100hz and 1K tuning steps making it easy to scan the band (segment).

A little bit of checking, by sending a CQ – and Theo found that the Keyer was ” a bit clunky..” by this, it was not perfectly clean with a bit of lag and non-responsiveness at times. After a bit of trial and error, and adjusting the keyer speed a bit (up to 21wpm) it was a bit better.

Theo had a few calls and contacts on both 40M and 20M and after a bit of getting used to it, he described the CW keyer in the FX-4a as “a bit different, not as good as his 7410, but certainly usable once you get used to it” – but good enough to use.

As a direct comparison, I also had my KX3 with me – and the KX3 is the Benchmark QRP/Portable TXCVR. We connected up the Bencher paddle, and antenna to the KX3 and Theo found the keyer to be very similar to his IC7410 – nice and smooth by comparison.

Summary: Features are fine (adjust tone, set keyer type and also A/B, tuning steps, RX filter, keyer speed), configuration via the menu – took a few tries to understand the options and set up the paddle, but once done no problem. The keyer itself is a little “clunky” and not as refined as keyers in more expensive rigs. 

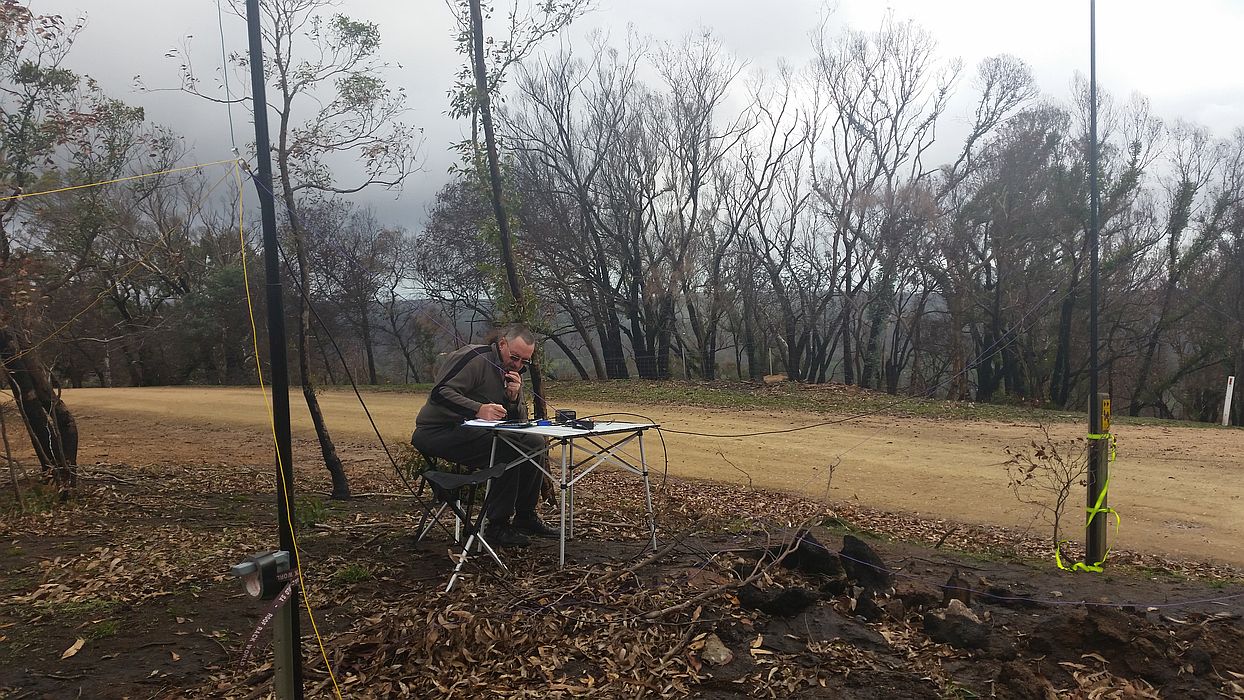
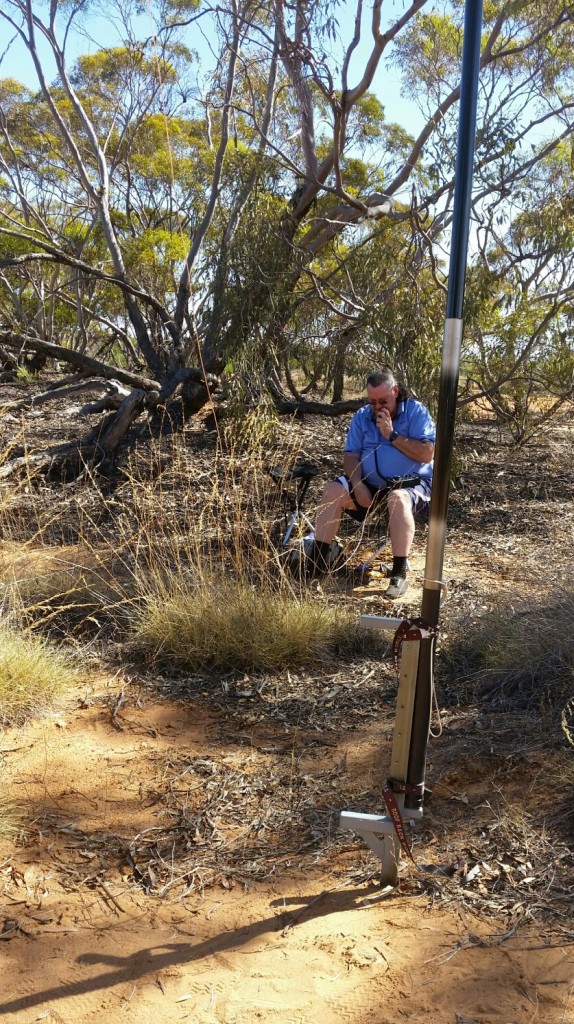
SSB – real world usage

I took advantage of the 2nd Year anniversary of the SANPCPA and went out and used the FX-4a on 2 portable activation’s over the weekend.

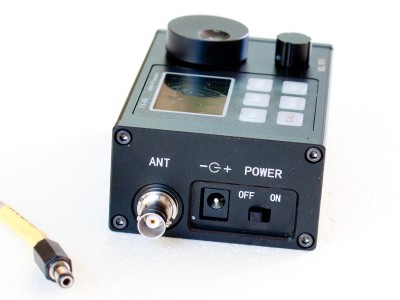
I used my normal 4s 5000maH LiP battery and fed it via a DC-DC 12A step-down module with the output adjusted to 13.0V

Initial impressions on the RX was that it was pretty good –  I had no problems making several contacts.

Whilst the RX is quite basic – fixed filter, good working AGC with just a tuning knob, and a volume control.

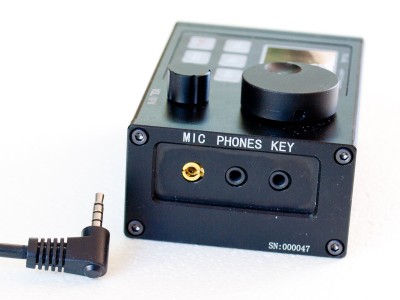
On the volume, the supplied speaker-mic for RX is fairly quiet – but usable in a pinch!  as this rig has no internal  speaker, you will need a suitable external speaker or earphones.  I was using it with an external 8 ohm speaker and found that about 1/3 volume was quite comfortable.

TX – no bad reports on TX and i was using the supplied speaker-mic.  My initial testing of the mic indicated that I had to be very close and really “talk it up” to drive the radio, so I pulled it apart and drilled out a 2mm hole  which was a big improvement – “normal” speaking volumes 2-5cm from the Microphone would drive the TX just fine.

Power Usage:  This is where things get interesting!  This thing is a real miser!  For my first activation, it was around 2 hours, and my little battery usage meter on the lipo indicated that I had only used 11% of my battery capacity.  My 2nd activation of about 2 hours on the same battery gave a repeat performance, with only 24% total usage from the battery.   So, Yes, It is fair to say that even a much smaller (and lighter) battery such as a 3s 2200maH (220g) would give 4+ hours of use and additionally remove the requirement for the DC-DC step-down converter as well.

Menu and user interface:  The usage is pretty straight-forward – simple to change bands, change tuning steps, swap between the A and B VFO’s.

Summary:  Easy to use, small and lightweight, Capable basic TX and RX.

OLYMPUS DIGITAL CAMERA

The test Bench

Real-world usage is only half the Story, and that half is positive. so onto the bench testing. I arranged with Matt, VK5ZM to assist in the testing, as his test bench is much better equipped than mine!

All tests were carried out using a 4S Lipo and a DC-DC buck converter with the output voltage set to 13.0V

Current Draw

(measured on the 13V input)

RX Current draw  210ma
TX Current draw (CW, 12W output) 1790ma

RX Sensitivity and Selectivity

Using a calibrated signal source, set to 7.120 it was plugged in using my standard 10M run of RG316 (cable and connectors approx 1db of losses) the MDS (minimal discernible signal) was down at -132dbm.  we tested this by having a carrier mid-way in the audio passband and turned the signal down until it was no longer heard, then verified by sweeping across the RX as well.

MDS at the connector is a very respectable 133dbm or 0.045uV

Yep, a pretty good start!

Next, we set the signal source up to -120dbm and did a sweep across the filter.  The filter bandwidth was found to be 2.1kz wide at approx -10db point.   A quick sweep at -90dbm indicated that it was out to around 4.4khz – again quite respectable.

Output Power

First off CW.

Key-down  it was 12W.  Much better than the expected 5W

During the testing the sidetone became pretty annoying, so I jumped into the menu and set it at level1.  When I next keyed up this was a little surprise – as the CW output actually dropped off to 1W.  A bit puzzled, a bit more testing was done at each sidetone level from 1 thru 10.

Sidetone LevelOutput Power
11 Watt
25 Watts
310 Watts
411 Watts
5-1012 Watts

This then led us to believe that the CW being generated is by injecting an audio signal into the SSB, and most likely the explanation for why the CW keyer felt a little off when Theo was testing!

Next, SSB output.

The simple grab the mic and whistle indicated that the PEP is around the 8W mark, but injecting 2-tones, the maximum output was up at 12W again.

 Spectral purity

The final things that we looked at was how clean the output is, so it was hooked up to the Spectrum analyzer.

Opposite sideband suppression  was more than 50db  down on the wanted sideband, as was the carrier suppression – so we have a good, clean SSB signal.

 Spurious emissions

The noise floor of the spectrum analyzer was about 65db below the carrier.

Key-down on all 4 bands indicated that there were no sign of any mixer products at all, if they were present then it is less than -65db

Harmonics
BandHarmonic
40M2nd -60db
30M2nd -60db
20M2nd -50db
3rd -52db
17M2nd -55db
3rd -60db

Once again, there was very little unwanted radiated signal – very clean output.

IMD

Final test was to inject a 2-tone audio signal – which was done at very high level (pushing the output to the maximum 12W)

BandIMD output Level
40M-30db
30M-28db
20M-25db
17M-28db

The worst IMD products were -25db, and on seeing this, Matt’s comment was “I would have no hesitation using this as an exciter and driving to 400W – that is pretty good”

Visual

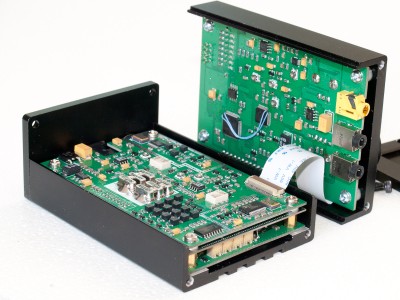
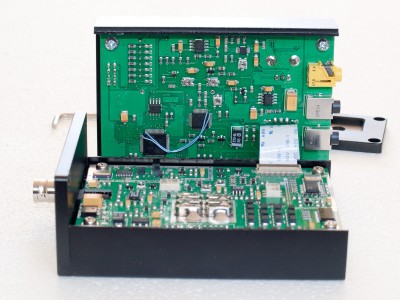
Now where would any Ham be without pulling something apart to look at the internals! Of course we wanted to take a look.

FX-4a End cover removed

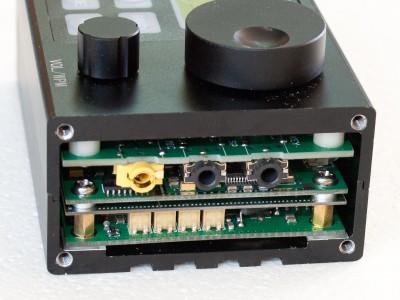
First off, the case on this is good – excellent fit, and feels rock-solid. Reality is, that I wish the physical construction of the KX3 was as good!  Inside the case there are 3 Circuit boards – The display/processor and audio board (top) – The Mixer/IF board (middle) and the output/PA board, which has a shield between it and the Mixer board (bottom)

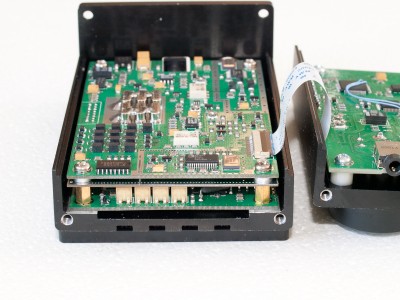
All boards were inspected under a 50x scope to check the quality of the assembly – all looked to be of good quality.  It was reasonably easy to identify the major blocks – the Micro-Controllers, the Mixer, IF Amplifier, 6-pole Xtal filter, the DDS’s – yes there are 2 in there, the Drivers and Final Amplifiers.


All tests show that it is a good quality build, and good specs.  Short of physical abuse, there is not a lot to go wrong.  Yes as noted, the keypad may be a weak part, but only time will tell on that.

Short of dropping it into the knobs or BNC connector this looks like it will survive being in a backpack and regularly used as a portable HF rig for a long time.

Conclusions

Honestly, look at the spec’s of both the Yaesu 817nd  and the KX3 – you will see that it falls right between them.

The bench testing results did reveal a few interesting insights (CW being an audio injected tone) but they also validated everything else that was already determined from real world usage.

OK time to rate it:

CW 3.5/5
As noted in the testing, the keyer is only OK, and as identified on the bench testing, the probably reason was identified.  Yes, it works, it has a keyer, it is configurable for straight key, and Iambic A and B.  The added bonus is of course, that the output power is adjustable via the sidetone level.

SSB 4.5/5
No real complaints here – rock-solid performer.

RX 4/5
The sensitivity is very good, the selectivity is very good, the AGC is just fine, I guess just because I sort of expect an RF attenuator, noise blanker, notch filter, variable Bandwidth filters etc why I marked it down a little.  It is a rock-solid, basic single conversion RX.

Build Quality: 4.5/5
Nice solid aluminum case, VFO knob feels great to use, standard connectors.  The only potential issue as already noted is the membrane keypad and that the connectors are soldered directly the boards,

Ease of use:  4.5/5
A quick look at the User manual and a 3 minute play with it and you know everything that you need and want.

Overall rating: 4.25/5

Supplied speaker/mic is adequate, adding an external speaker or headphones is a big improvement.  There was no supplied power cable – so I had to supply a standard DC 2.5mm plug.

Where it fits in the marketplace – well that is easy!  This is the perfect ultra-lightweight SSB HF transceiver that is incredibly capable.  Let’s be honest, Not everyone can afford a KX3, and with this rig you will not feel you are wanting. A quality contender and a serious step up from some of the other cheap HF radios that have hit the market over the last 3 or 4 years.  It nicely fills the gap between a kit and the KX3 (which I consider the Benchmark in portable HF)

With 40M and 20M being the 2 most popular HF bands for SOTA and portable operations in general, it would also be a great First HF radio for an “F” call.

I  would not hesitate to recommend anyone wanting a compact portable HF rig or even a 2nd or 3rd portable rig to get one!

Disclaimer

I am currently negotiating with the designer of this little radio to be the VK dealer, more information to follow as and when this may occur.   Bottom line, I would not even consider putting my name against this if I was not happy with it!

After Breakfast

A bit of an impromptu Activation today of Mt Lofty.

Work has been getting in the way of heading out portable over the last week or so but today, I grabbed an opportunity.

Well, this morning had a very nice brunch at the Crafers Gourmet Deli which was is only 4 km from the summit.  Highly recommended – grab a meal, then do a SOTA activation!  On the way out the door, grabbed the bag and checked that I had everything I needed.

First off Breakfast was awesome!

wpid-20150301_110251.jpg

Yeah, it was worth the drive to the Cafe!

Anyway after a nice meal, it was off to Mt Lofty summit.

We set up about 100m from the car park just inside the gates on 40M  and put up a spot and gave a few calls.

It was pretty tough going – some of the worst conditions I can remember for a long time on 40M – Every single contact was a challenge.  So much that it was a releif when I made the 4th and qualified this summit (first time in 2015)

After a struggle on 40, with 10 contacts logged across VK2,3 and 7.  There were some chasers who were way down in the noise, that I could not pull out.

And a Big THANKS (NOT!) to the “helpful” person who decided that they felt the need to relay callsigns and signal reports and therefore invalidating a couple of contacts.  Whilst you think you are helping, you only guarantee that a chaser is not logged and gets no points.

I tried 30M next.  It was a lot better, the contacts were quite a bit easier – and put 4 into the log here from VK1,2 and 3.  30M is the sweet spot most of the time from VK5 into VK1 – or the 900km distance mark nearly every time I try 30, I end up with VK1 chasers in the log.  Today was no exception and the noise on 30 was quite a bit lower than on 40.

wpid-20150301_122633.jpg

While I was calling on 30M (yeah gotta love the voice keyer on the KX3!)

Off to 20M, hoping to pick up any of the VK6 boys – but no such luck. Did manage to pull out a couple who said they could not hear me on both lower bands at all so it was worth the try.  20M added 6 more chasers to the logs from VK3,4 and a surprise – VK5 as well.  Once again, 20M conditions were not brilliant, but the noise was even less than the lower bands and it made the contacts that much easier.

Finally I jumped back to 40M and hoped that the conditions had improved, but well, lets just say that not really!  I did add a few extra contacts to the logs across VK3 and 5.

One thing for sure the WX was about perfect for a summit hovering around the 20 deg mark and nice and sunny.

Finally pulled the plug after about 90 minutes and had 26 contacts logged.  Thanks to all the chasers who persisted in tough conditions to make this an enjoyable activation.

Batteries

I have recently switched over to using 4S 5000maH Lipo batteries for my portable  operations – and dropped the weight down from 2.7kg for a 9aH SLAB to 550g.  Today, I did this whole 90 minute activation using the same battery that I had for my last 2 Friday evening Twilight Activation’s.  I have not written them up, but the first was nearly 3 1/2 hours, and the 2nd was about 2/12 hours.  At the end of today, this put just over 7 hours of operations on the battery – and at the end it was still about 35% charge remaining.

I have just finished floating it up and in fact, it was only 60% down.

This is a massive improvement over the time I was getting from the SLAB’s with their inherent high internal resistance and low voltage.

Yes, 4S Lipo when fully charged is 16.8V, which is a tad hot for the KX3 – so yes, I do utilize a battery conditioner which I have posted about before.

For the $32 for the battery (hard case from hobby king) it is one of the best investments I have made for my portable kit.  Now I know that with the 2 batteries I have, I can do at least 10 hours of portable operations and not need to worry.

Morgan CP


Boxing day 26th Dec 2014 Morgan CP Activation Report

Morgan CP was the 2nd ever CP that I activated way back in April or there about.

I was in Morgan, and saw that Paul (5PAS was going to be heading out, so ducked over to the CP , and set up.  I had made a few changes to my portable station and this was a good chance to try them out.

The obvious one….

Morgan CP 20141226

Yeah, what I call my SotaPost – it is a 1M long “star” post with a foot peg, handle and pole support welded on.  The foot peg, for pushing it into the ground, the handle for well, holding it and also easy removal and the pole support is pretty obvious.

The soil is quite sandy (in places where it is not solid rock) at this CP, and I needed to find a suitable location where I could raise the pole the 9M without trees – the pole was a big bonus, and even though it was only in the sand about 300-400mm it was a solid support for the squid pole and the 40M dipole, it did not look like falling over.

Now, the other additions which you can’t see (i’ll write up a separate post on later) is an updated power system.  Yes, after one too many times of lugging the 9aH SLAB’s around I grabbed a 4S 5000maH LiPo battery, necessary charger and a battery monitor.

The biggest benefits are actually that the battery weight has now reduced from 2.7kg down to 530g, which when on a long hike is a massive saving, and this alone allows me to pack my SotaPost and still come in lighter overall!

Yes, the 4S LiPo is 14.8V (nominal) and up to 16.85V fully charged, it means I can’t directly connect it to the KX3. But connected to my DC-DC conditioner (which I have mentioned in the past) it worked a real treat, and much to my surprise, this battery source looks like it is going to be very close in usable life to the 9aH SLAB.

As you can see from the photo, I chose to just set up in a shady spot to operate from.  The weather was near perfect for being out and about, with the temperature in the mid 20’s and a gentle breeze to keep the files away.

So, without posting an alert, and just posting a spot to ParksnPeaks website, I started calling on 40M and before long the chasers had found me.  It really is an indication that by Spotting when out and about you will get calls.

It was a pretty relaxed activation and the calls were fairly steady, no pile-ups, so I was able to have a bit of a chat with the chasers on this activation, rather than the usual (hectic) hello,  signal report and move on, which made for a nice change.

Literally while waiting for Paul to come on the air, I worked several VK3 and VK5 stations, including a contact with Joe (3YSP) and Julie (3FOWL) who were portable in the Warby-Ovens National Park.

Not long after that, I heard Paul also talking to Joe and Julie before he moved to another frequency, where I was able to make a P2P contact to Paul (5PAS) in Munyaroo CP (via Whyalla).

14 Contacts in around 90 minutes on a very pleasant afternoon – yeah, this is why I love going out portable.

My portable operation of 90 Minutes and a check on the LiPo at the end saw that I had only used around 15% of the charge, and given that during this activation the TX time was probably quite high, given I was able to chat a bit more with almost all chasers is an indication that this power solution is more than adequate for at least a full day’s of portable operations.  More to come as I actually use it in the coming days.

WSPR

WSPR or Weak Signal Propagation Reporter is something that I recently discovered and have started to realize just how this real-time data can be used as a part of all other radio activity.

First off, WSPR is a series of low power – usually between 100mW and 5W beacons that around 500 Amateurs all over the world run.  A WSPR station is usually one where you both TX and RX, and when you RX, you upload your reports to the wsprnet site.  Now the beauty of this is that with a little bit of know-how on how it all works, you get a brilliant insight into the probable HF Bands and opening in near-real time, no predictions here – all real-world, right now reports.

I won’t go into great details on how it all works, but instead, I’ll give just enough info so you can learn for yourself how to use this data.

First off, jump on the site and go to the map page.  Here, select a band, and then take a look at both the 30 minute and 10 minute maps for each bands that are of interest.  If there are lines on the map, it indicates either a TX or RX path – but more on that shortly.

Check out the stations that are closest to you, make a note of the callsigns of a couple of them .  we will use these callsigns as search parameters in the database.   Go to the database, and click the specify the query parameters link.  Here, put the given callsign in both the call and reporter box, select the band and time to drill down on some data!

Sample of received wspr beacons

Now, at first look, it does not mean a lot, but within the data there is a wealth of information.  Just take the very first line, and we can see the date/time the station that is sending the report, the Received Signal (SNR), Grid square they are sending from,  the TX power of the beacon, and finally your details.

WSPR beacons are 110.5 seconds long and are a weak signal mode, and can detect signals down to about -30db below the RX noise and all of this info is really important in understanding how we can use this data.

Lets look at the specifics of the first line of data -12b, and a 2W beacon.   To determine if this might be a workable path, we need to do some basic maths.  Now, to get this signal up to say, 3db over the noise floor or 15db, we can look at the 2W and add 15db to it – and we come up with a  power level of around 60W.  So, if you have a typical 100W transmitter, it is highly probable you would have a working path! If you listen, you can often hear signals that are around -6db, so saying 3db over the noise is a reasonable estimate of what is probably workable via SSB.

Now, if we take a bit of time, look at the maps, see where there are a lot of paths between general areas (eg, 20M lots of lines to either US or EU), look at the actual reports, do a bit of basic maths, and voila!

Now, finally, how does this help with portable operations, such as SOTA.  to tell the truth, exactly the same!  You just need to look at potential paths but this time based on QRP power levels you will be running from a summit, and take into consideration, that usually the noise floor is a lot less – like 10 or more DB lower, which you can take into consideration!

So, what does this mean?  Well, before I go out, I take a quick look at the maps, all the bands that appear to be open and to where and give them a shot – If there is an indication of a particular path being open, then it is worth giving it a go!

If even 2 or 3 regular SOTA activators in each association put up a WSPR station running about 1W on the more popular SOTA bands (40M – thru 10M ), then this would quickly become a valuable tool for both activators and chasers alike.  Just think that if we had say even 2 40M stations in all VK states we would quickly develop a picture that we could then additionally cross-reference to what it showed compared to what was worked – further validating the usefulness.

To this end, I have built a dedicated 0.5W WSPR transmitter – the QRPLabs Ultimate 3 Kit and Currently testing it.  Once I am happy with it, I will be installing the required antennas and putting it into service.  I will be installing it at a remote (to me) location, and hopefully, with a handful of other VK RX WSPR stations, it will prove to be a useful resource for monitoring real-time and also long-term trends of propagation.

A RX station is easy – use any receiver that you can interface to your PC – heck even an SDR with a HF up-converter can be used.  Some people have also reported success in running multiple SDR’s on different bands on the same PC.

Yeah, you could go and look at the numerous predictions, but is it not more fun to measure them yourself?

Stay tuned, once I get my beacon in place there will be more details, but for now, look up the WSPR frequencies, and see if you can RX my beacon – It can be found on all bands 40-10M and beacons 3 times per hour per band.  At the moment, it is running into a vertical and I have only had a limited success, but another antenna system is in the works.