A quick Activation

As today saw the temperature plummet from the heatwave of the last 4 days, I decided to duck up the hill to Mt Gawler – VK5/SE-013 and see what the bands were doing – well, that and go out and hope to get a VK5  to ZL1 S2S as there was some ZL1 activity going on.

This was a bit of a different activation today as I went with a little bit of new kit for the first time.

New Toys

Can you guess?  no ?

Ok, the SideKar and keyboard for direct entry logging is not new, had it for a while now and am really starting to get used to it rather than the paper log.

You might have noticed the external amplified JBL speaker, but no, that’s not it either!

Ok, it is the QRO! (well not quite) but the HR-50 amplifier to give the KX3 a bit of a bump from 10w up to the 50+ watt mark  (well, more like 60w on most bands).

I have had the kit for a few month’s and managed to put it together about a week ago and today was the first time I have had a chance to give it a run in the field.  By All reports – the bit of extra output helped – pretty good reports all day.

Band conditions were very strange – very short hops on bands where it was not really expected!

I started out on 15m and worked VK3, VK1 and VK7 stations.  On the suggestion of Tony, VK3CAT, I then gave 10m a try and was rewarded with VK3 and VK1 contacts for my log.  As I was using the 30m dipole for 10m, I then gave a call out on 30m and worked VK2, VK3 and VK5.  20m was the best band of the day and I worked VK2,3,4,5’s and ZL3CC for my only DX of the day.  I always end up on 40m for at least a bit of every activation and I worked into VK2, VK3 and VK5 before I packed up for the day.

I was able to round out the day with the final station logged of VI3ANZAC on the last day that this call will be activated.

I did see the spots for ZL1 activation on 20m and could hear a few of the chasers, but alas, no VK5 to ZL1 S2S today, but hope it won’t take too long to get one!

As always, thanks to all the chasers as you make it all worthwhile.


Building the WARS Powerpole Kit

Like  many of us, I am forever on the look out to managing power connections and of late have been moving more towards standardizing on Powerpoles for my (up to) 45A Connections.

Recently, I purchased one of the WARS (Waverly Amateur Radio Society) Powerpole Kits and finally found a bit of time to assemble it.  I won’t go into any details on the kit – all the info is available from the WARS site.

The assembly is pretty straight forward, just take your time and follow the instructions and it will all come together.

Have a decent high-power soldering iron available. My 15/40W soldering iron was on the lowest end of what you would want! It took quite a lot to heat up the connections on the + and – rail sides, there is a LOT of copper on the board.  I would have liked a 60+ W iron to do this, and will borrow one for the next kit I assemble.

It took me a few hours to assemble it – partially because of the low-powered soldering iron and aside from that, just took my time, careful with the alignment of the power poles and the fuses. What I didn’t do, but should have done is to trim off the leg lengths of the #13 wire on the power poles BEFORE soldering them to the board – it was difficult to trim them off after soldered to the board as you will need a strong pair of snips to trim them.

It all went together just fine and now I have done it, I need to purchase another couple of these :).  This was bought for a specific purpose and also to see if it would make a suitable alternative to a commercial one – wins on all counts.

Assembled and ready for boxing

After assembling there is room for a few Improvements:

If you install the Input power poles on the board at the 90Deg (like mine) the instructions say to make the cut-out 18mm wide and 15mm deep into the case. the 18mm is a nice neat fit, but the 15mm leave a big gap, I would say that 13mm is more than enough.  It is easy to trim a little more out, but much harder to add it back in!

You cannot see it, but when in the box there is about a 3mm gap above the input powerpoles.

Additionally, the print-out for the cut-out in the top of the box is also wrong! It is way too long – the end closest to the INPUT should be about 3mm less than the template. The end with the LED is correct.

Assembled in the box showing the cut-out around the powerpoles and fuses

Be careful with the alignment of the template when cutting it out – as mine was about 1mm off to 1 side and I had to ease the opening out a bit wider so it would all go together.  You can see that on the side of the power poles that there is an extra gap – as the cut-out was slightly off, and the side near the fuses needed to be eased slightly for everything to fit.

The kit includes insulated spade connectors which are used to hold the fuses.  I tried following the instructions supplied, but found it faster and easier to cut away the insulation with a knife.

A nice touch is the blown fuse indicator – where a small red LED will light up when a fuse blows making it obvious of where the problem lies.

Testing the "Blown Fuse" you can just see a slight red from the LED on the fuse holder, but very easy when viewed from the top
Testing the “Blown Fuse” you can just see a slight red from the LED in the image.

You can see the bi-coloured power LED.  With the correct polarity, it is green, reversed it is red – you don’t want to see it red, but at this stage, you do want to test it to verify.

At around 1/3 of the cost of an equivalent commercial product, adding a couple of these to your portable and field day kits will not break the bank – and provides an easy, convenient way to fuse protect your equipment, with enough outlets to power almost all of your equipment.  For that matter, adding a few to your shack as well is a good option for DC distribution

Those minor issues aside, pretty happy with the end product.  All in all, I rate it as 4.5/5.

VKFF Weekend Nov 2015

For the VKFF Activation weekend, we found the time to get out to one of the new SA parks that had recently been added to the VKFF list.  On the Saturday afternoon, we were able to get out to the Ramco Point CP – VKFF-0930

This is a little gem of a park that at first it is unclear on it’s boundaries,  but with a little bit of searching, we were able to find it.  The frustrating bit is this park is not listed on Google Maps but it is listed on the Protected Planet Maps.

Now, this has not always been Ramco Point CP – as is evidence from the old signs on the borders to the park.

Ramco Forest Reserve

The park extends from between the Ramco Lagoon, up the cliff face to a small area adjacent to the Cadell Valley Road, where we entered the park.

We found a suitable spot not far from the top of the cliffs on an un-used track and set up.  It was not the highest point in the park, but down the slope a bit which did offer a bit of extra protection should the wind have come up.

Ramco Pt CP
Ramco Pt CP

We picked a spot where there was a tree to tie up the squid pole and offer a bit of shade for the afternoon.

The Shack for the day
Setting up
Setting up
Map courtesy of protected planet

The red dot on the map was our operating position on the cliff top.

We arrived mid-afternoon as the hope was to work EU if 20M was open. We were a bit early so started out on 15M.

Once we were set up we called  first on 15M and worked Rick VK4RF for the very first contact from Ramco Point CP as a VKFF park.

We made a handful of contacts before heading to 40M where we made quite a few more before trying 20M.  Well, 20M did not really open up and we only had a single, very difficult DX contact on 20 with DK4RM, so we headed back to 40M and kept working the stations in an attempt to get the 44 and make it a valid WWFF activation.

A highlight was to work Peter, VK3YE who was flying a kite on Chelsea beach to support a wire antenna on 40M,

As the day went on 40M also improved and eventually, we had logged 44 contacts!  We did work a few more as there were a couple of duplicates in the logs – with contacts on different bands and also a couple of others who had moved to different parks.

The Results

We ended the day with 53 stations logged, 4 on 15M, 6 on 20M and 43 on 40M and in the mix we worked 11 VKFF Park to Park contacts.  With just 2 repeats (different bands), 1 duplicate, and another contact that was with VK3ZPF from 2 different parks, we well and truly passed the 44 with a total of 48 unique contacts for the day.

Of course, Ramco Point CP also qualifies for the SANPCA as well, and this was a new one for me as an activator.

This was also a good day, as before we went out to the park I logged a further 7 VKFF parks as a chaser – and that is well over 1/2 of the activators who were out on Saturday who I logged.

Just before packing up, I walked to the cliff-top to take in the spectacular views offered here.

Murray River - Downstream
Murray River – Downstream

The view downstream – right in the foreground down the cliff you can see the backwater where the Ramco Lagoon flows into the Murray River.

If you look at the map, from our operating position, this is the view towards to top of the map

Murray River - Upstream
Murray River – Upstream

Looking upstream, again with the Ramco Lagoon in the foreground and a bit more to the right, then the Murray River  all the way back to Waikerie. This is the view from the red dot towards the bottom right on the map.

We were blessed with a very pleasant operating spot, a few steps away from spectacular view up and down the Murray River and a really nice day with temperatures in the mid 20’s  – It simply doesn’t get much better than this!

Team VK5FI

Well, for something completely different.

Team VK5FI is VK5RR and VK5FO, and FI is ‘5RR’s other callsign.

We decided to have a go in the VHF/UHF Spring Field day.  With the introduction of the (up to) 4 band section, and having both reasonable power and antennas for the task on the 3 low bands where we put the station together over a few weeks and yesterday morning got out and had a good solid go in the 8 hour section.  The intention was to operate SSB and FM on 6m, 2m and 70cm

For the location, we decided on the Ardrossan lookout at PF85WN – which is about 80km (los) across the Gulf back to Adelaide.

spring-vhf-uhf-2015Screenshot from contestradar

Now a little about the station we put together

The Common Equipment

To power the station we had a 165aH AGM 12V battery, and A huge thanks to VK5AKH for the loan of his Honda Generator – which we used to “float” the battery and to also provide power to the logging Laptops – we had no issues at all with power for the day.

We had the battery in the trailer, which also served as a support for all the antenna’s.

The station consisted of 3 txcvr’s – 1 for each band we were operating.  All 3 Radios used have remote heads, which makes setting up a lot easier than having to set up right next to the battery in the trailer!

We used the Armstrong method for rotating the beams.

The 6M Station

The station was quite simple – we put back into service the ancient IC-706  and coupled to a 2 Element Beam (horizontal), running a full 100w.

The antenna was on the same pole as the 70cm beam and up at about 4m High.

The 2M Station

On 2m we used the IC-7100 feeding a 6 Element Beam (Vertical) on it’s own pole up at around the 4.5M mark.  After about the first 2 hours, we realized that when you unplug the remote head from an IC-7100, that it reset the output power – so for the first 2 hours, we were only running 1W output instead of the intended 50W!  (and surprisingly, we did not really suffer too much as a result).

We also put up a Slim-Jim vertical at 10M high for 2m and had it connected up to a handheld, but in the end did not use it or the contest.

The 70cm Station

On 70cm we opted to us the TS-2000 – as it is the highest power we have on this band.  It was coupled to a 17 Element short boom yagi (approx 2m long) and put on the same pole as the 6m antenna at about 5M high.  We set the polarity to be 45deg – so not truly vertical or horizontal.

We arrived at the Ardrossan lookout with a bit over an hour to set up.

20151114_101028

Overlooking the Gulf from the lookout with the antennas on the roof racks.

So, we positioned ourselves where we could set up and operate and also so as not to be in the way with other visitors to the lookout and set up the station.

20151114_114435

The station, set up and ready to go.

Just out of the photo to the left we set up the generator near the rock,  The trailer – it has the battery in it and also supports the 2 (3*) poles for the antenna’s.  The plastic box on the draw bar contains the 3 transceivers – all close to the power source!  On the Other side of the car we tied up a tarp to provide shade over the table we set up to operate from.

The 3rd pole was the 12m spiderbeam pole with the 2m Slim Jim.

20151114_115214

The other side.

20151114_114454

The trailer with the battery and the poles for the antenna’s – and under the tarp is ‘5RR starting to operate on 2M.  The esky was lunch!

We did a simple split – based on the antenna’s – Ray operated the 2M station and I contended with 6m and 70cm.

We were able to plod along and work a reasonable number of stations from this location.  For the most part on all bands we were able to simply leave the antennas pointed (roughly) at Adelaide, but there were a few exceptions where it was necessary to swing around to the North to make contacts.

The day was not great and the wind was quite strong and at around 5:30 the wind literally ripped the tarp to bits!  We had to take a bit of a break and move from the table into the car to keep operating.

With all stations having remote heads, this was not too much trouble to do – just pick up each remote head and feed them in the back of the car.  It made the rest of the operating more difficult.

According to VKCL we ended up with:

6m –  33 contacts
2m – 48 contacts
70cm –  51 contacts

Lessons and Improvements

Now, we are not really big VHF/UHF operators and it has probably been around 20 years since we did any sort of VHF/UHF contesting, let alone operating portable like this.

A decent, high operating point is a real advantage and having additional antenna gain was most welcome.

2 operators would still be easy to add a 4th band to the mix.  The combination of 6m and 70cm worked out ok.

The Good
  • It was a Fun day out!
  • We made a decent number of contacts on both FM and SSB on the chosen operating bands.
  • The set-up proved to be effective – set up in about 45 minutes, same for station pack-up.
The Improvements
  • Antennas for each band on their own pole.
  • Headphones/headsets!  With 2 operators literally sitting next to each other, and all 3 radios turned up at the same time it was difficult at times to hear.
  • Antenna’s – with the wind they moved around a bit!

For this sort of operating, on even these bands we literally pulled together all the gear we had at short notice and went out to give it a go.  It was obvious that there were stations we could not hear from our location and we later found out that there were several stations in the metro area using nothing more than a handheld – these are the one’s we could not hear.

Even the very modest home stations we were able to work in the Adelaide metro area.

For this style of operating, we had about the right mix of power and antenna gain from where we were.  We had no real issues of interference between the bands, maybe a little be of de-sense but nothing too be worried about.

The antenna choices were proven to be effective – vertical polarization (except 6m – we didn’t have the mast height) and the boom length on 2m and 70cm meant we could rotate them without it physically interfering with the other ones on the other pole – it was not necessary to go larger in this case.  It might be a different story if there were stations further afield that  you were chasing – but with the majority of the activity within close proximity to the Metro area  it was a good mix of being both physically easy to manage and gain.

A review on the logs and we determined that the range of all stations worked was between 61 and 158km from us.

Update – The Results


Division 1

 Portable Loctn: PF85WN - Ardrossan Lookout

 L'tors Actvtd: PF85 

 Section: B2b: Portable Multi-Op, 8 hours, Four Band

 Division: 1: Locator Based Scoring

 Operators: VK5RR Ray, VK5FO Bob

 No.of Contacts: 132

 Total Score: 792

Division 2

 Portable Loctn: PF85WN - Ardrossan Lookout

 L'tors Actvtd: PF85

 Section: B2b: Portable Multi-Op, 8 hours, Four Band

 Division: 2: Distance Based Scoring

 Operators: VK5RR Ray, VK5FO Bob

 No.of Contacts: 132

 Total Score: 24037


Leeches and Ticks

On a recent trip to VK4 I wanted to get in a couple of summits, so a quick look before going, and tried to work in a couple with where I would be and I ended up getting up to 2 Summits – VK4/SE-117 and then VK4/SW-001  As an added bonus, VK4/SW-001 is also in the middle of the Bunya Mountans National park – and VKFF-0067

Friday 23rd October – Tenision Woods Mountain

First off VK4SE-117 – Tenision Woods Mountain   a 6-pointer, looked to be easy from the Maps – with the summit a few hundred metres off the Mt Glorious road, about 2km West of Mt Glorious –  which itself is to the North-West of Brisbane.

As it turned out, it was an easy to access summit – with just enough room on the Mt Glorious Rd for 1 car to pull over on the track to the summit.  An un-expected surprise, was that the path to the summit was fenced with a National Parks’ sign on the gate!  So, I suspected, that this was also a VKFF location as well.

Now I am home, I have searched out the details and sure enough, Tenision Woods Mountain is within the D’Aguilar National Park, and is VKFF-0129.

Ok, onto the Activation. First off the Locality photos- 20151023_135450

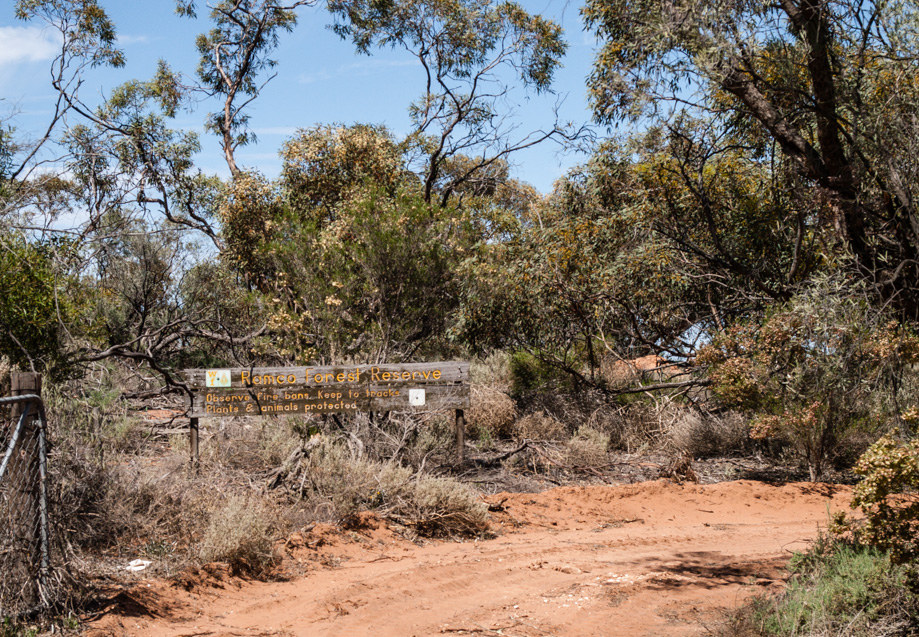
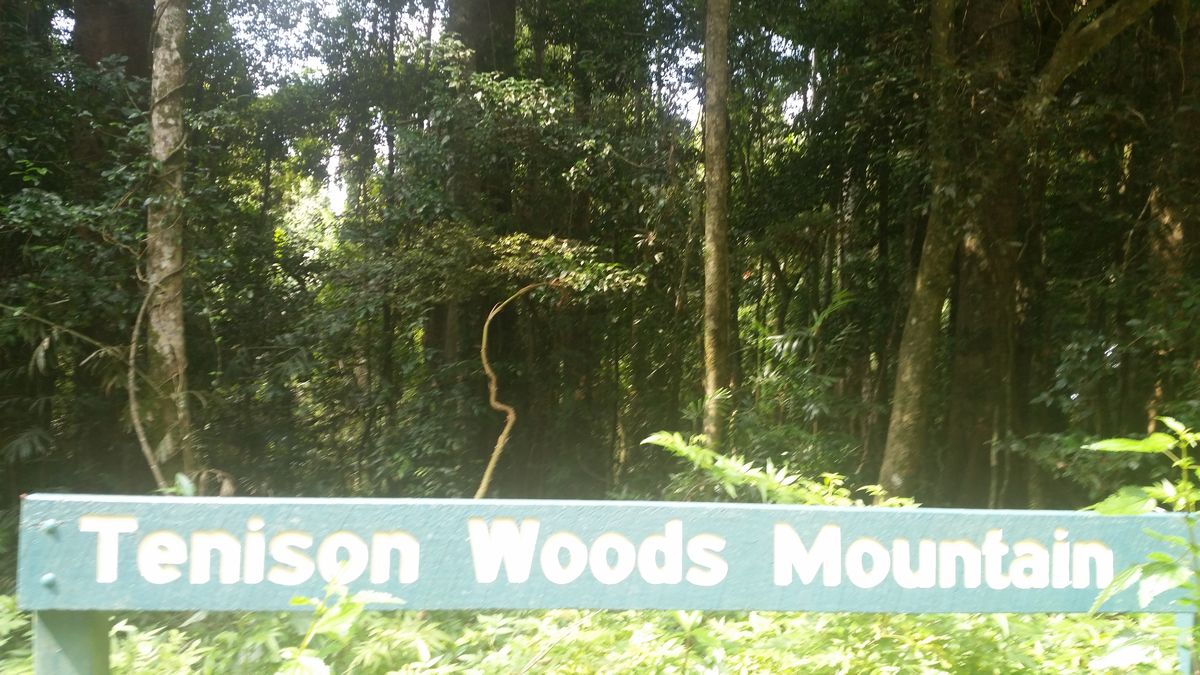
The Sign at the side of the road at the track up to the summit.

20151023_140333
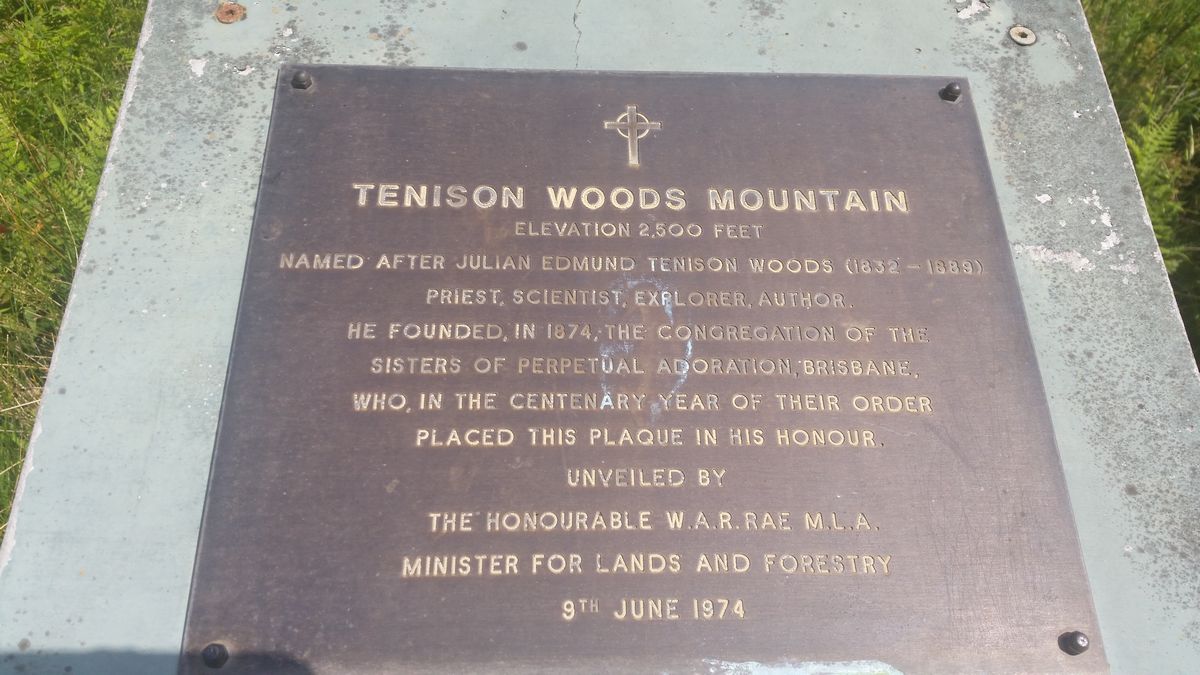
The plaque located right at the summit.

20151023_142111

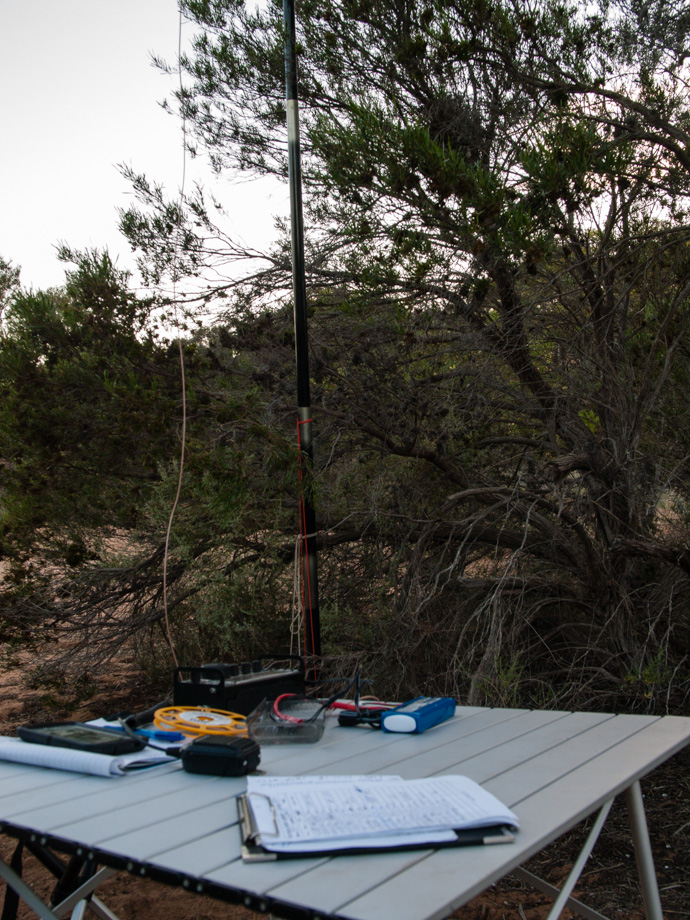
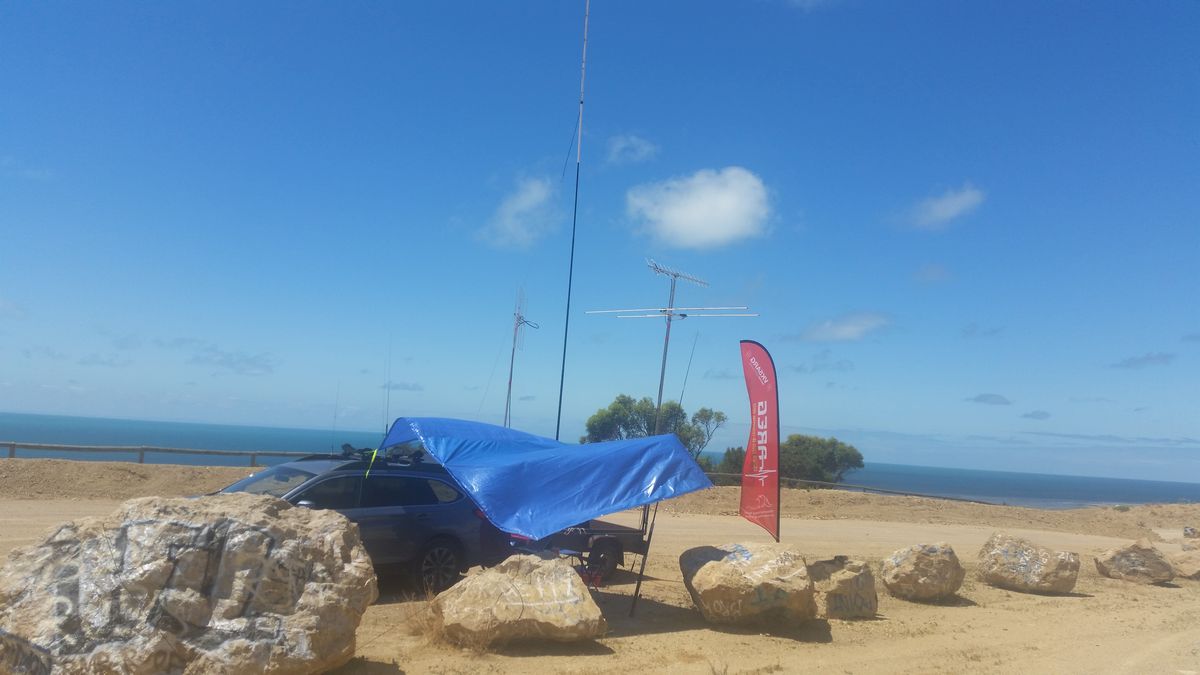
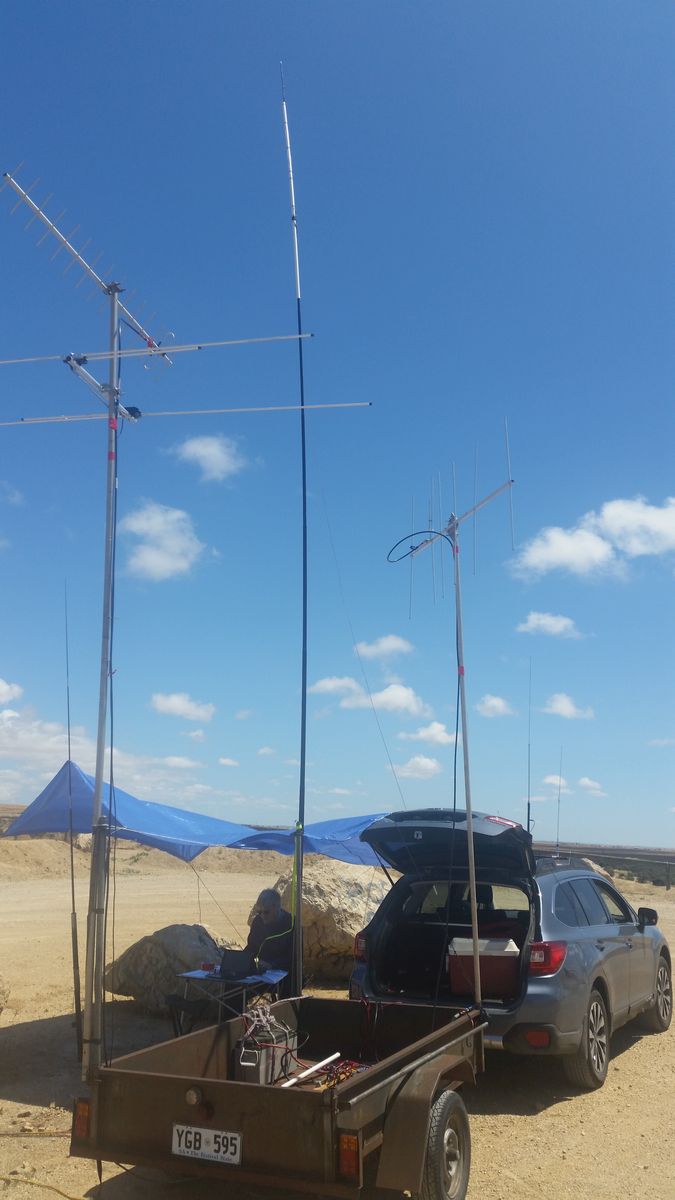
The “shack”  Sitting on a log on the side of the walking trail just back from the comms tower at the summit.

As I was flyig to VK4 I was not able to pack my squid pole and had to rely on just throwing a rope over a convenient tree branch to pull up the Dipole.  I managed to get it about 5m high in the center in the rainforest.

Now, the first part of the blog post will become obvious – The Leeches -Yep, there rainforest here was home to leeches and the little blood-suckers jumped on everyone but me! So, take my advice – carry the insect repellent and apply liberally before venturing onto this summit!

Now, this was probably a bad time to be actually activating the summit it was Friday 23rd Oct in the mid afternoon – just after 04:00 UTC when we made it to the summit on the drive thru and were set up.   Knowing that I only had a short time, I only planned to activate on 15M and then 40M (both just using the 40M dipole).

I was able to post an alert and then post a spot as I set up and it wasn’t long before I was rewarded with my first contact.  Logging just 2 contacts on 15M and then jumped down to 40M where we were rewarded with a further 9 contacts (with 7 uniques).  As I had just 9 unique calls in the logs I decided to give 20M a quick go – to try and get the 10 required for VKFF – and   making it a valid VKFF activation as well, so I decided to give 20M a quick try.  I was rewarded with my efforts with a further 4 contacts – and 2 more uniques to give me 11 unique contacts for the dual activation.

With contacts to VK4, VK2, VK3 and a single DX contact to RA3PCI it was successful for my first VK4 Activation.

We packed up, did a double-check for leeches and headed off to our destination.

Saturday/Sunday  24/25th October – Mt Kiangarow / Bunya Mountains

I had planned to spend a couple of hours on the Sunday Morning and activate the 10-pointer VK4/SW-001 across the UTC roll-over on the Sunday Morning.  I had already determined that this would be a dual activation being within the Bunya Mountains National Park VKFF-0067.

With the Guys meeting in Wagga Wagga and the expected activity of several summits being activated in the Riverina Area of NSW, I was hopeful of at least a couple of S2S contacts.

Like Tenision Woods Mountain this summit was one that was
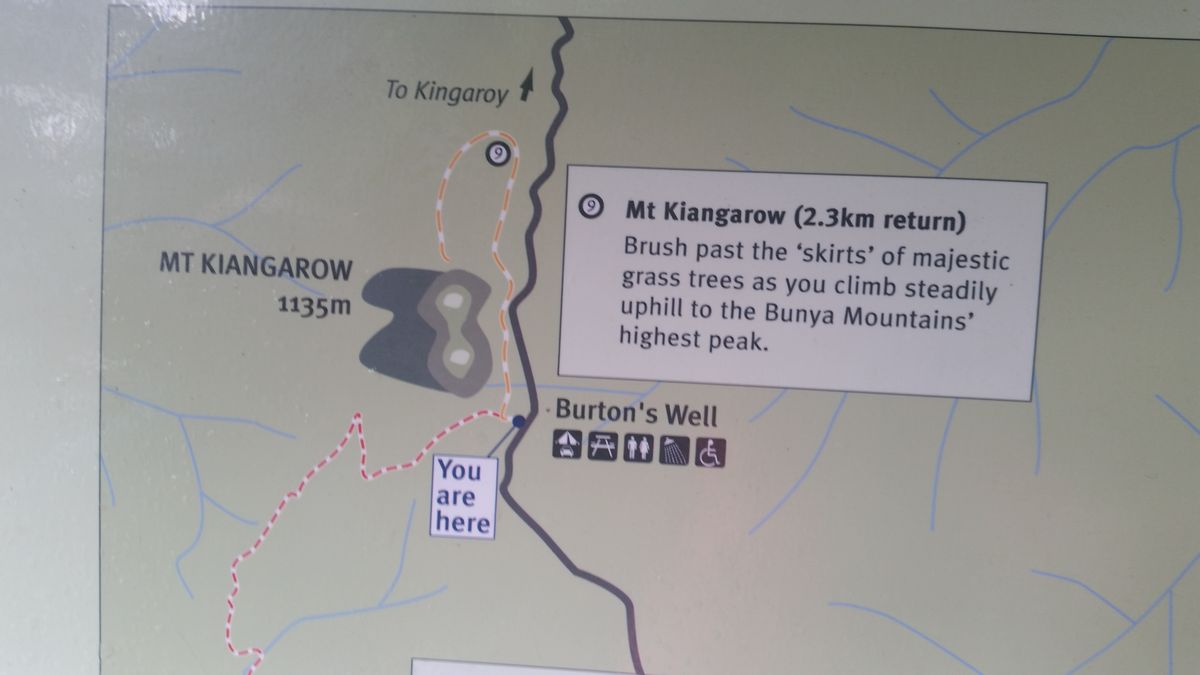
reasonably accessable with a rad thru the National Park, and a short  1.3km walk along a well-maintained track to the Summit lookout.

20151025_091119

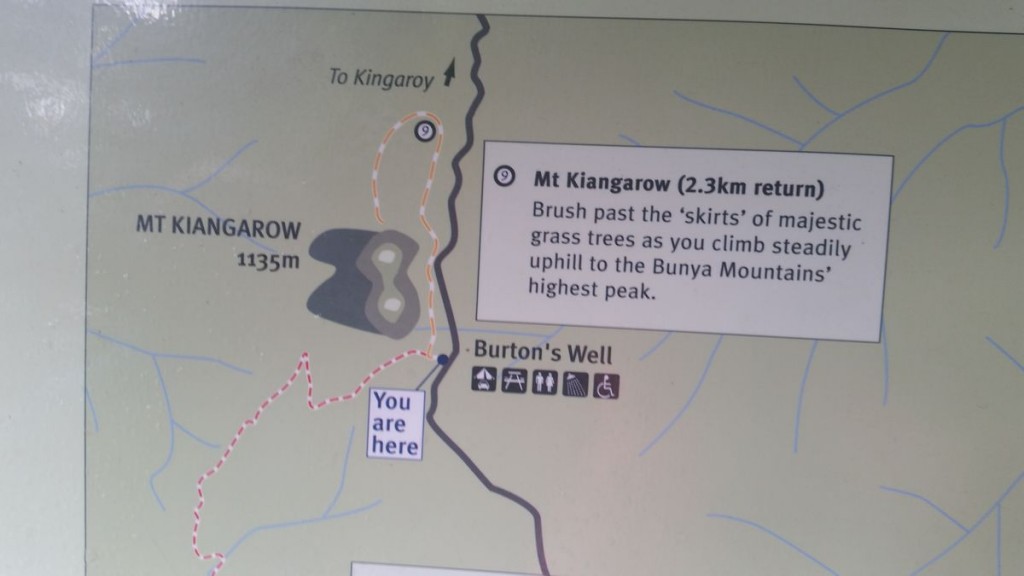
The Sign showing the walking trail around and up to the summit.

20151025_091011

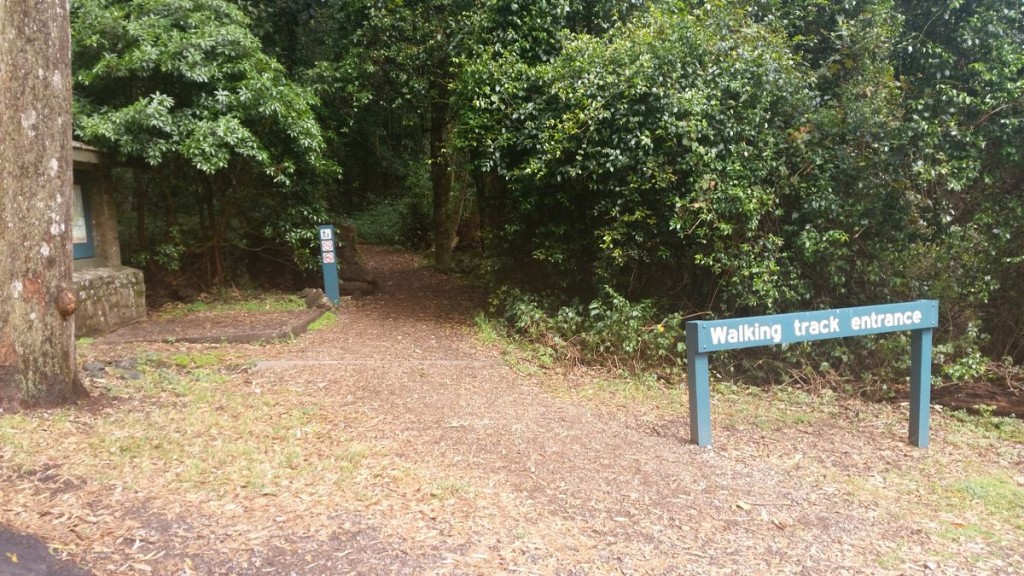
The entrance to the track to the summit.

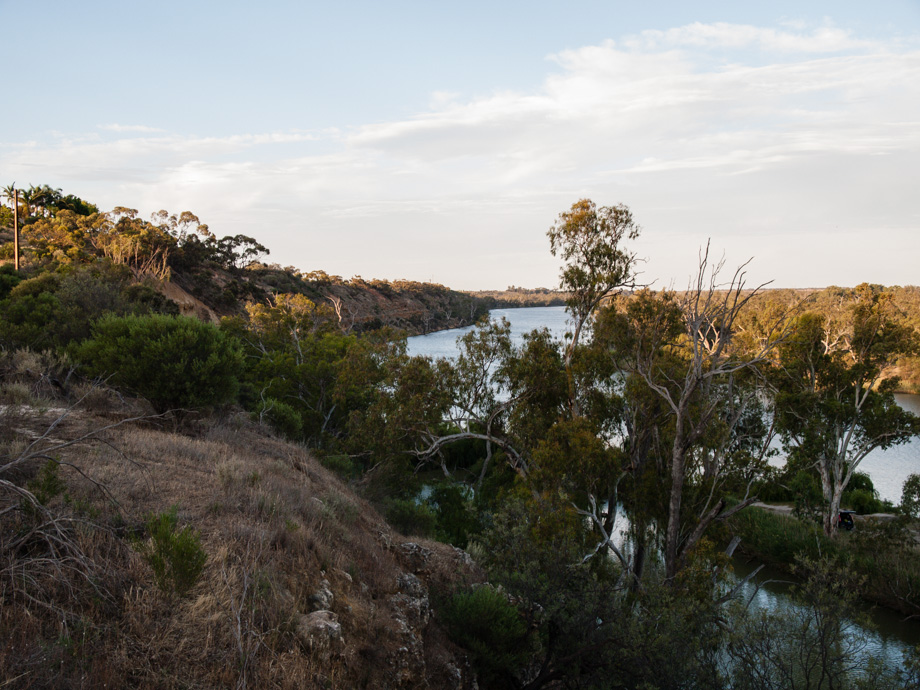
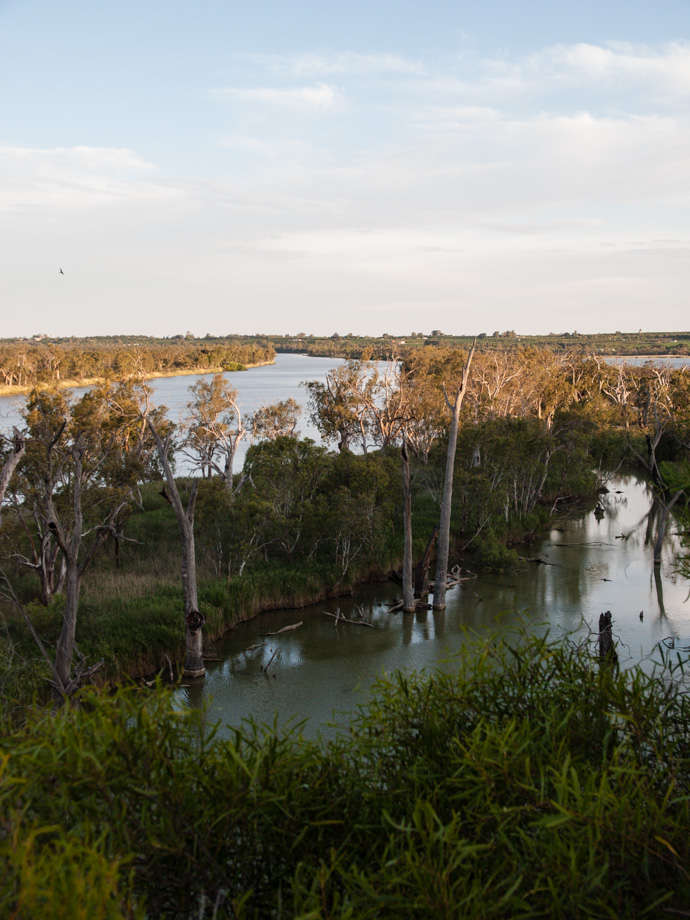
After an easy 15 minute walk up the track you could se thru the rainforest a comms tower on the summit, and about a 100m further on we came to the end of the track, with spectacular views out to the north and a convenient seat!

20151025_105434

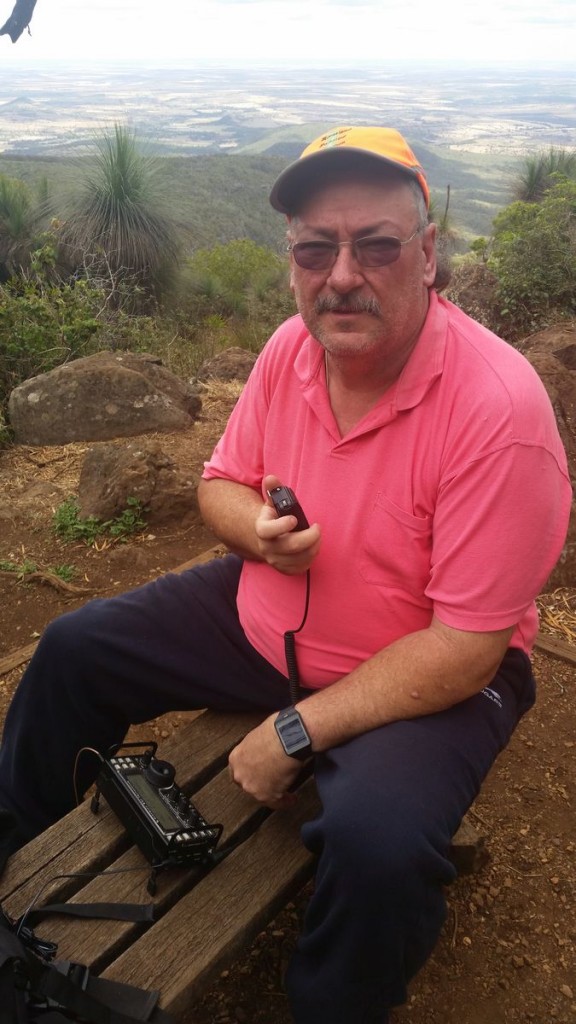
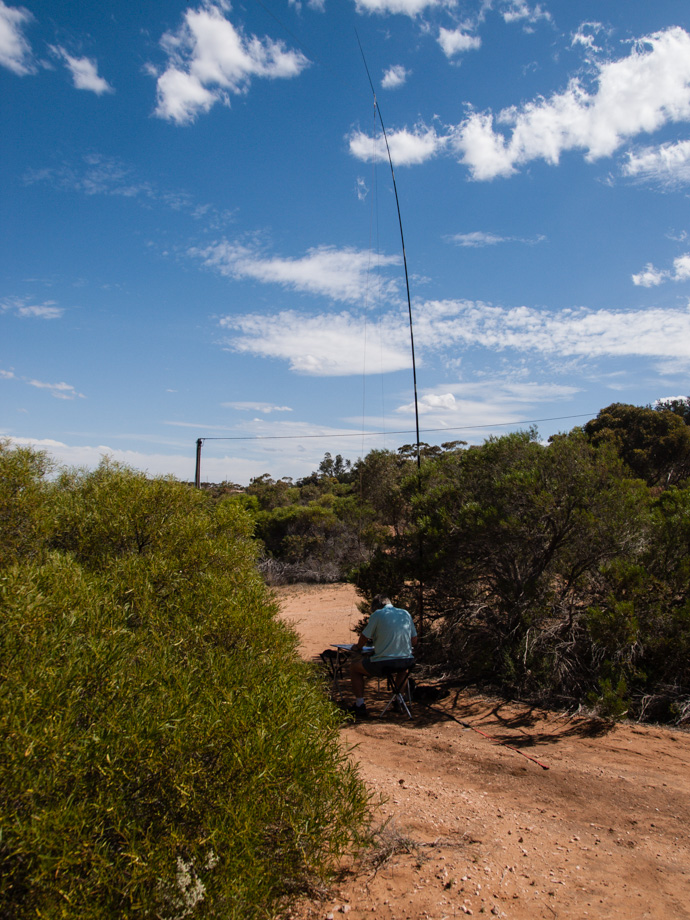
Sitting on the seat on the Summit.

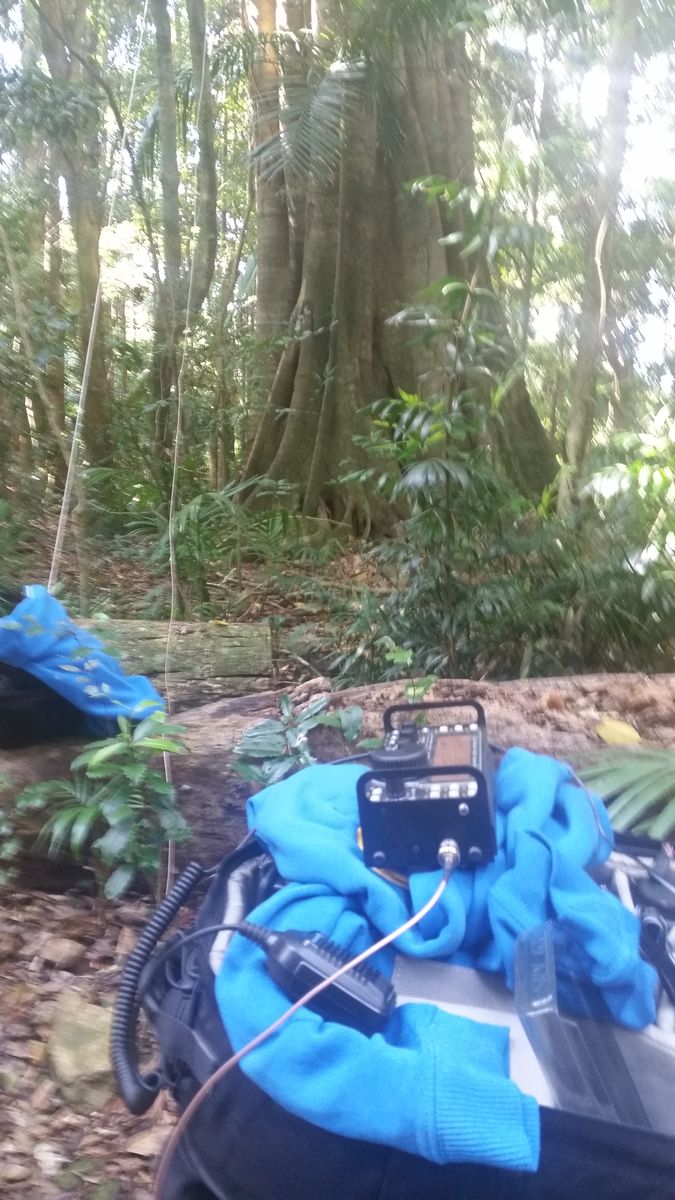
As it was only 15 minutes util roll-over, I wasted no time in getting the Dipole strung up.  Unlike on Friday, there were not many tall tree’s here and I really wished I had a squid pole, but made do with what I had – and the dipole was strung up about 3m from the ground!

I decided to work 40M before roll-over to maximize the chance of a as many contacts as possible -and managed to get 5, including 2 operators on VK2/RI-031.

Post roll-over, I stayed on 40M and continued to work contacts and again worked the 2 Activators on VK2/RI-025 for some more S2S action.

I worked 10 contacts on 40M before moving onto 15M and worked a further 4 chasers before jumping onto 20M, working another 8 chasers including a S2S contact to VK2/RI-026.

On a whim, I jumped onto 10M and worked my only DX for the day and also my only contester (CQWW) W5PR in Texas. and again a repeat chaser as well.

I took a look over my logs and decided o jump back to 40M after looking at the spots in an attempt to work a couple more S2S contacts.  I tried and tried but had an incomplete – the other station could not hear me and was about to give up and finally completed a contact with my 4th S2S for the day to VK1/AC-009.

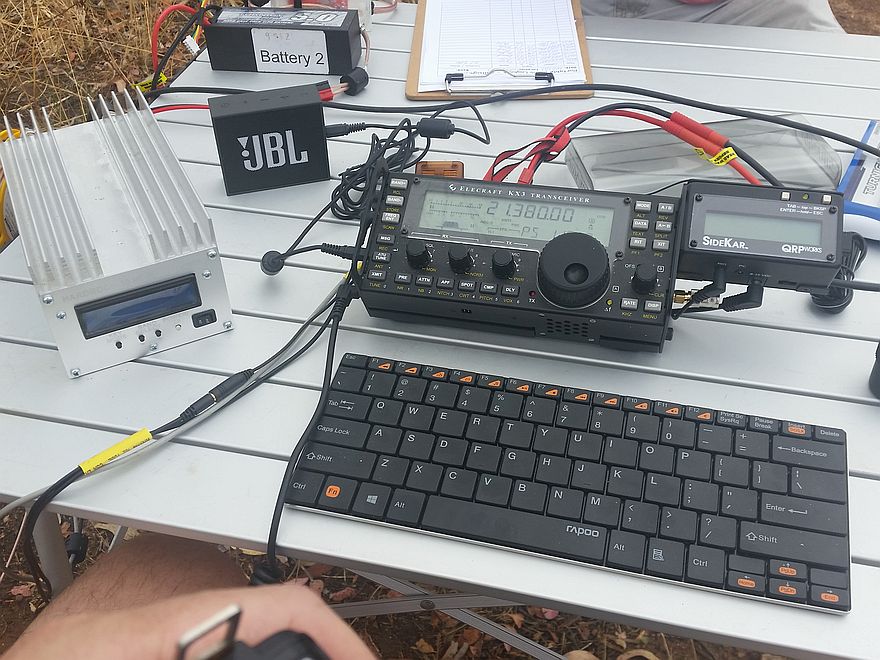
I was well please with this contact as It gave me something new that I had never done before when activating any summit – that last contact put into my Log  VK1, VK2, VK3, VK4, VK5, VK6, VK7 and VK8 from the same summit (across 4 bands) -and all using just 10W with the KX3 and a dipole that was no more than 3M high!

20151025_105428

Another shot of the shack for the day – with the stunning views!  That black thing in the top right is the winder at the end of my dipole about 2M high!

Yes, I do have more photos but have not pulled them off the camera yet – I’ll get to them soon!

It was nearly 2 hours, and  S2S with 4 unique summits, working All VK call areas except VK0 and VK9, some (well a single) DX and a total of 26 contacts (22 uniques) it was a great day to be out Portable.

Again, I had enough chasers to make this a successful VKFF activation.  I’ll get the logs up in the near future!

A big thanks to all the chasers who made the 2 activations I did in VK4 a success.  Yes, conditions were a bit tough and I know that there were a few that I just could’t hear, but next time!

I almost forgot – the Ticks – Well, yep, when we got home, I discovered that I was the unlucky one this time and picked up a couple of ticks!  1 uner the arm and another one on the other arm – so yeah, should have sprayed on the Aerogard!

2 new summits,  1 New association and I can’t remember who, but I even managed to give out a complete on VK4/SW-001 to someone else who had activated it on a recent trip to VK4.

I just wished that I had more time and had a chance to see more of the summits in VK4 – but there is always next time and a lot of summits to chose from!